Designed & Shipped from USA
Wej-It Logo
Inject-TITE™ FS (Fast-Set) Adhesive Adhesives Wej-It
Wej-It

Inject-TITE™ FS (Fast-Set) Adhesive

$26.00

Description

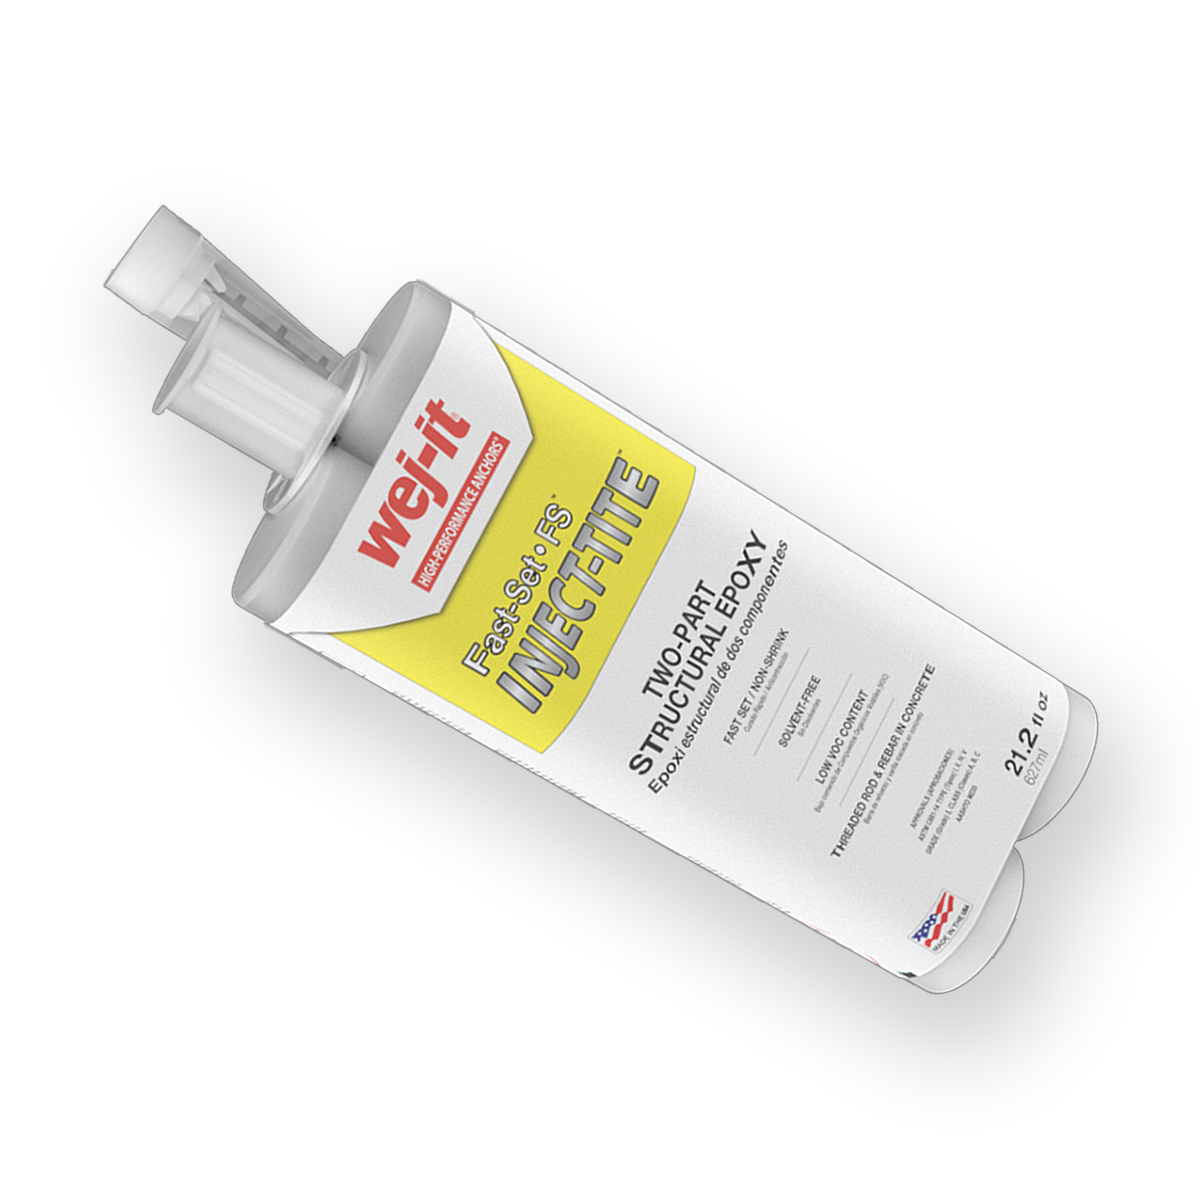
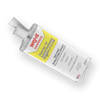
Inject-TITE FS is a 2-component, 1:1 mix ration, structural epoxy system that offers exceptional strength in anchoring and doweling applications. Tested in accordance with ASTM E488 and ASTM E1512 for its capability to resist static, dynamic, seismic and wind loads in uncracked concrete for both threaded rod and rebar.

Fast & Secure Packaging

Ships fast in 24 hours

Dedicated Customer Support

Materials / Finishes

  • Part A (resin) white: Part B (hardener) black
    Mixed ratio: 1:1, mixed color – concrete gray

Features and Benefits

  • Withstands freeze-thaw conditions
  • Little to no odor
  • Moisture insensitive allowing installation and curing in damp environments
  • High modulus
  • In-Service temperature range between 35ºF (2ºC) and 180ºF (82ºC)
icon

Anchors for every load, project and skill level.

icon

Trusted brand by professional builders.

icon

Guaranteed performance.

icon

Proudly Designed and Shipped from USA.

Product Details
Installation
Catalog Number
Description
Quantity
Carton Quantity
EFS9
8.6 fl oz (254 ml) Cartridge
1
12
EFS21
21.2 fl oz (627 ml) Cartridge
1
12

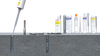
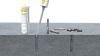
Drilling and Cleaning

  1. Using a rotary hammer drill, and a bit which conforms to ANSI B212.15 and is the appropriate size for the anchor diameter to be installed, drill the hole to the specified embedment depth. CAUTION: Always wear appropriate personal protection equipment (PPE) for eyes, ears & skin and avoid inhalation of dust during the drilling and cleaning process. Refer to the Safety Data Sheet (SDS) for details prior to proceeding.
  2. NOTE: Remove any standing water from hole prior to beginning the cleaning process. If removal of standing water is not possible, please contact Wej-It for application specific installation instructions. Using oil free compressed air with a minimum pressure of 80 psi (5.5 bar), insert the air wand to the bottom of the drilled hole and blow out the debris with an up/down motion for a minimum of 4 seconds/cycles (4X).
  3. Select the correct wire brush size for the drilled hole diameter (see Table 2), making sure that the brush is long enough to reach the bottom of the drilled hole. Reaching the bottom of the hole, brush in an up/down and twisting motion for 4 cycles (4X). CAUTION: The brush should contact the walls of the hole. If it does not, the brush is either too worn or small and should be replaced with a new brush of the correct diameter.
  4. Blow the hole out once more to remove brush debris using oil free compressed air with a minimum pressure of 80 psi (5.5 bar). Insert the air wand to the bottom of the drilled hole and blow out the debris with an up/down motion for a minimum of 4 seconds/cycles (4X). Visually inspect the hole to confirm it is clean. NOTE: If installation will be delayed for any reason, cover cleaned holes to prevent contamination.


Cartridge Preparation

  1. CAUTION: Check the expiration date on the cartridge to ensure it is not expired. Do not use expired product! Remove the protective cap from the adhesive cartridge and insert the cartridge into the recommended dispensing tool. Before attaching mixing nozzle, balance the cartridge by dispensing a small amount of material until both components are flowing evenly. For a cleaner environment, hand mix the two components and let cure prior to disposal in accordance with local regulations.
  2. Only after the cartridge has been balanced, screw on the proper Wej-It mixing nozzle to the cartridge (see Table 1). Do not modify mixing nozzle and confirm that internal mixing element is in place prior to dispensing adhesive. Take note of the air and base material temperatures and review the working/full cure time chart (see Table 4) prior to starting the injection process.
  3. Dispense the initial amount of material from the mixing nozzle onto a disposable surface until the product is a uniform gray color with no streaks, as adhesive must be properly mixed in order to perform as published. Dis- pose of the initial amount of adhesive according to local regulations prior to injection into the drill hole. CAUTION: When changing cartridges, never re-use nozzles. A new nozzle should be used with each new cartridge and steps 5-7 should be repeated accordingly.


Installation and Curing (Vertical Down and Horizontal)

  1. NOTE: The engineering drawings must be followed. For any applications not covered by this document, or if there are any installation questions, please contact Wej-It. Insert the mixing nozzle to the bottom of the hole and fill from the bottom to the top approximately two-thirds full, being careful not to withdraw the nozzle too quickly as this may trap air in the adhesive. NOTE: When using a pneumatic dispensing tool, ensure that pressure is set at 90 psi (6.2 bar) maximum.
  2. Do not disturb, torque or apply any load to the installed anchor until the specified full cure time has passed. The amount of time needed to reach full cure is base material temperature dependent - refer to Table 4 for appropriate full cure time.
  3. Prior to inserting the threaded rod or rebar into the hole, make sure it is clean and free of oil and dirt and that the necessary embedment depth is marked on the anchor element. Insert the anchor element into the hole while turning 1-2 rotations prior to the anchor reaching the bottom of the hole. Excess adhesive should be visible on all sides of the fully installed anchor. For horizontal installations, wedges should be used to center and support the anchor while the adhesive is curing. CAUTION: Use extra care with deep embedment or high temperature installations to ensure that the working time has not elapsed prior to the anchor being fully installed.

Frequently Asked Questions

Please email us at orders@anchorco.com for a custom quotation.

Orders ship within 24 business hours after we receive them. Orders received before 2:00pm EST Monday through Friday usually ship the same business day (unless otherwise noted).

We are closed on the following holidays: New Years Day, Memorial Day, Independence Day, Labor Day, Thanksgiving, the day after Thanksgiving, and Christmas Day.

All orders ship from Connecticut. The drop-down menu in the shopping cart that shows the shipping rates also shows the number of days in which your order should reach you.

We send an email confirming your order the day your order is received. When your order ships we send a second email with your paid invoice and information to track your order.

If you have any questions or problems, please email us at orders@anchorco.com.

We do not have any retail locations. We are happy to meet all your anchoring needs with the anchorco.com website.

We do not ship internationally outside of the USA.

Please email us at orders@anchorco.com and our Customer Service department will be happy to assist you.

Our shopping cart is powered by Shopify, one of the most respected eCommerce platforms. It uses state of the art encryption and privacy tools to secure your purchase and your online account with us.

If you have any questions or problems, please email us at orders@anchorco.com.

Reliable Shipping

Fast, reliable shipping with UPS—every order, every time.

Secure Payments

Your payments are protected with Shopify’s advanced encryption.

Customer Support

Questions? Email orders@anchorco.com or call (203) 970-3175.

Reviews

Customer Reviews
5.0 Based on 1 Reviews
Write a Review

Thank you for submitting a review!

Your input is very much appreciated. Share it with your friends so they can enjoy it too!

Filter Reviews:
VO
10/25/2019
Vanessa O.
United States United States
Best Products!

Always can trust Anchor Co to deliver the best products